Instructions for use:
Selecting your Chimney Balloon
Each Chimney Balloon will fit a range of sizes but chimneys vary so much that you need an idea of what size your chimney is first.
If you have a round chimney, just measure the diameter (the distance straight across)
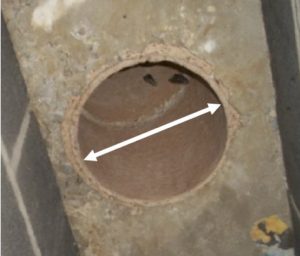
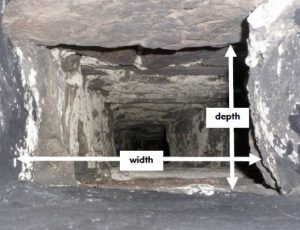
For oblong and square chimneys, measure side to side and front to back. If there’s a fire surround, measure the chimney beyond this.
If you’ve got a headtorch, it’s useful for keeping your hands free to measure. If you’ve got ski googles it will stop soot falling in your face. Just remember your balloon will soon be keeping you nice and warm and it will last for years so it’s worth taking a bit of trouble at this stage to make sure you get the right size.
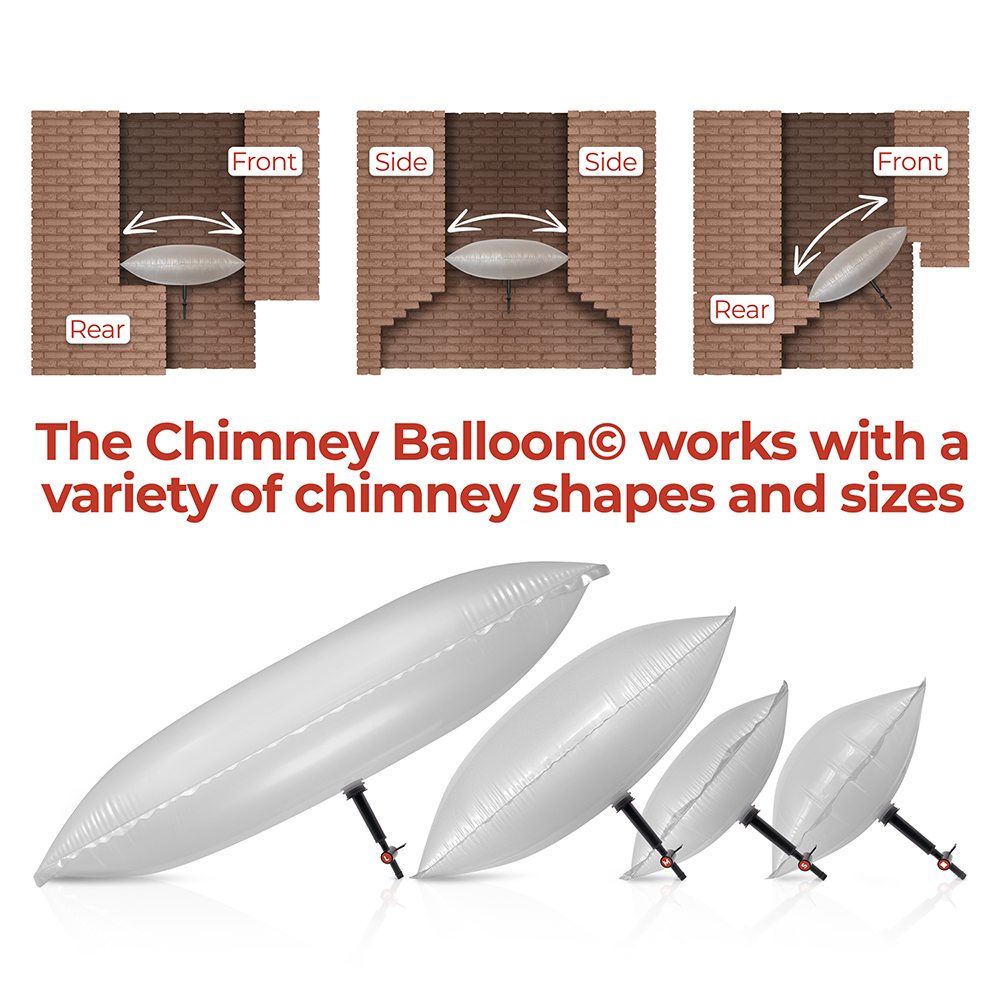
We’ve kept it simple! There are 4 sizes of Chimney Balloon so choose the one that is the nearest in size. Each one comes with a mouth inflation tube as standard.
If none of them seem to be right have a look at our sister company, Chimney Sheep. These felt chimney blockers can be made-to-measure so get in touch if you want a bespoke chimney draught excluder.
And finally, we like to please, so if that doesn’t look right try our Magnetic Fireplace Draught Excluders! These are perfect for any fireplace with a ferrous metal surround, including gas fires.
Fitting
The Chimney Balloon should fit snugly against 4 sides of the chimney without fretting or rubbing. It should be somewhere you can easily reach with the pump or mouth inflation tube. If you need to fit it higher up then you will need to purchase a hand-grip extension kit.
These are the most suitable locations to fit your Chimney Balloon:
Make sure the tap is open and pump some air into the balloon so that it starts to inflate. Once you’ve got a bit of air in it, put it in position to inflate it fully. If you have a cast iron fire surround make sure you can push it through the small gap before positioning it in the chimney to fully inflate it.
While you’re inflating it make sure it’s correctly positioned. It will move a little to where the chimney is widest.
Inflate until the balloon is firm. Then close off the tap.
If you’ve used the mouth inflation tube then the balloon will contract a bit as it cools. Once the balloon has gone down a little, top it up some more.
Make sure the hand-grip is hanging free without being pushed up against any obstacles.
Hang the “Remember to Remove” notice somewhere where it’s visible
If you are fitting it in a windy area where there is a strong updraught then it’s a good idea to tether the Chimney Balloon® to the grate with a piece of string to make sure it doesn’t get sucked up the chimney.
Removal
Open the tap and let the air out before carefully removing the Chimney Balloon®. It’s made of tough plastic but it doesn’t like being scraped against rough chimney walls too much.
Maintenance
If you’re leaving it in place for a long time then check it every 3 months or so to make sure it’s still fully inflated. Take it out once a year to make sure there’s no accumulated debris above it.
Sometimes over time friction against a rough chimney surface can cause small holes to occur. In this instance make sure the hole is clean and dry then simply stick a piece of adhesive tape over it. Make sure there are no wrinkles for air to trickle through.
Safety
If a fire is accidentally lit with the Balloon in place, it will quickly shrink and fall into the grate.